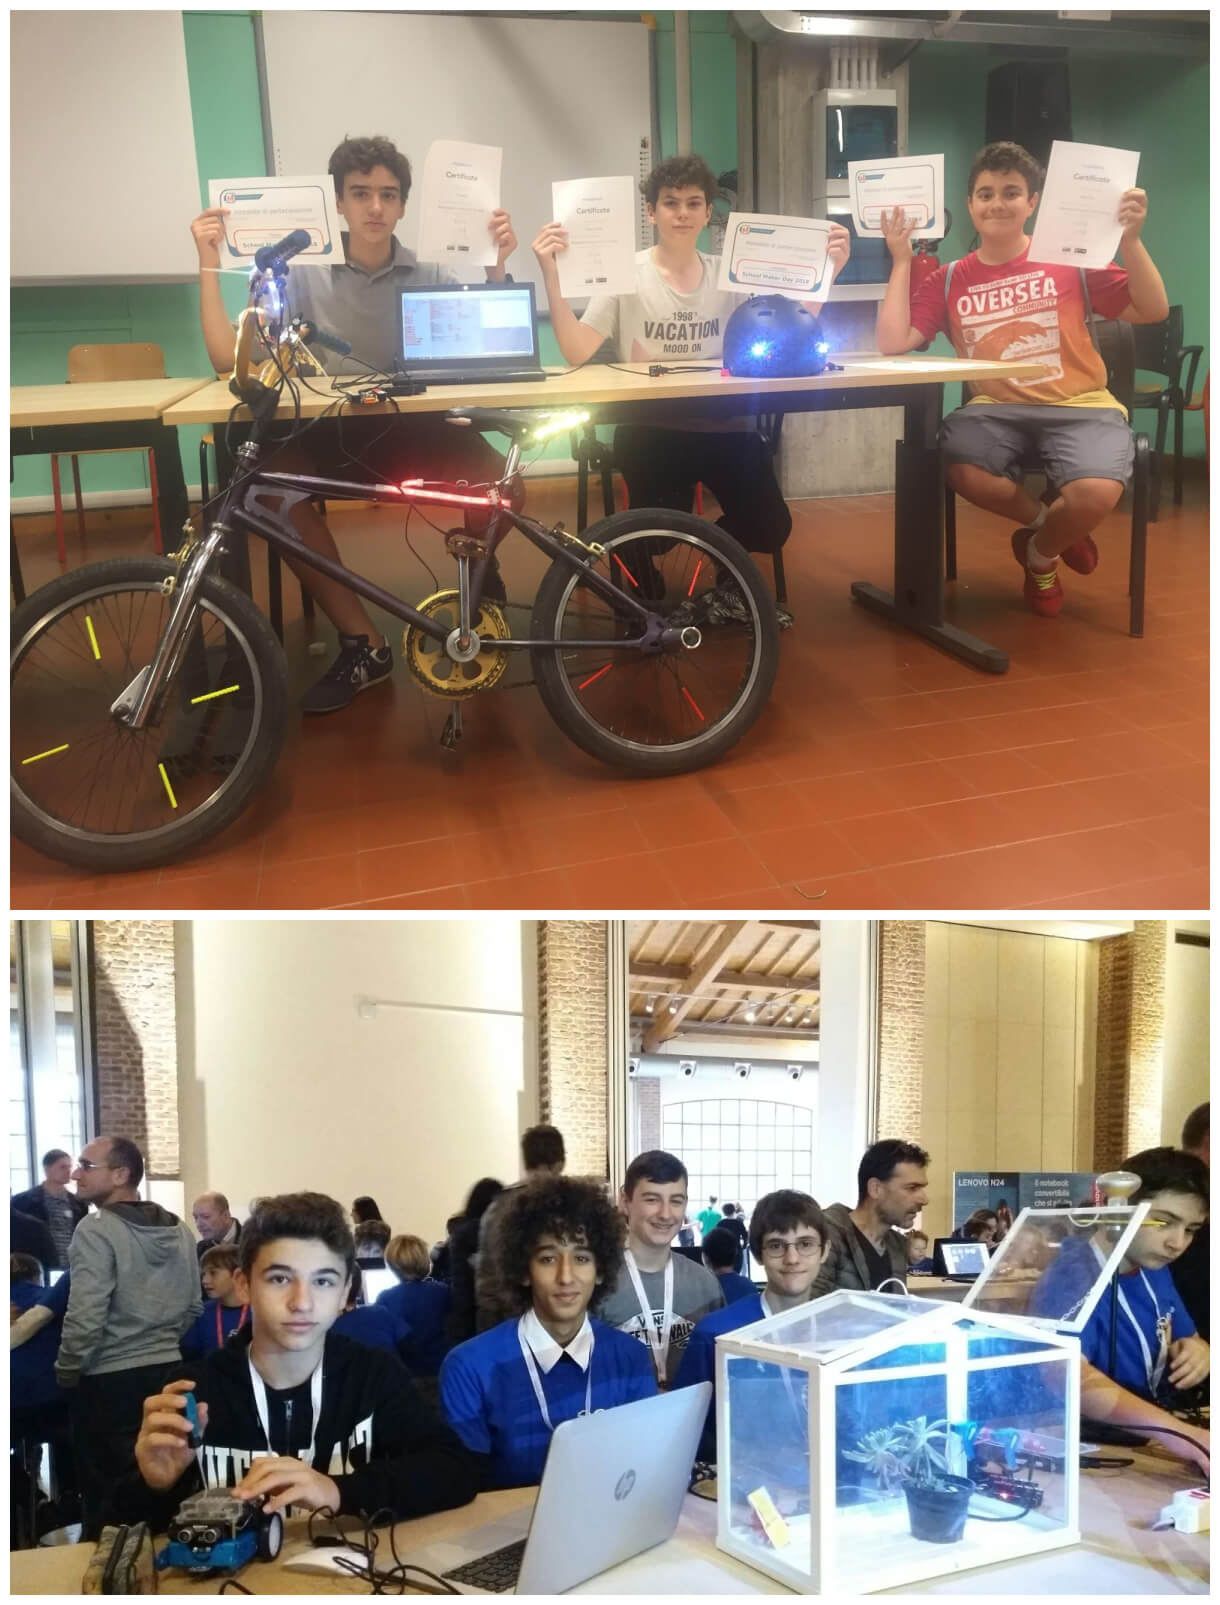
On May 12, 2018, an “Ardubike” was completed and showcased at the School Maker Day exhibition by 5 third-grade students in Bologna, Italy.
Organized and conducted by Luca D’Agostino, an educator and maker from IC9 Bologna lower secondary school, these 5 third-grade students had attended an optional lab for 30 hours (3 hours per week) to work on the “Ardubike” project.
With the goal to exercise and develop their STEAM skills, the students started this project by wondering what kind of safety feature could work for a modern 2.0 bike. After the first design lesson with their teacher Luca, they discussed the creative and important features they had in mind for their bikes and developed a plan.
Later in this lab, students learned how to use the Orion board (based on Arduino) with Makeblock sensors included in the Makeblock Inventor Electronic Kit, how to connect sensors to the board and how to program the board with mBlock, the programming software designed for STEAM education. During all of these courses, students worked in 2 groups, each group would work their own break-downed parts of the bike; eventually, all works would be put together to develop the final project.
The final project ensured a safety system for the bike using lights, turn signals and a fall alert based on a compass position control. (S.A.F.E., Signal Alert of Fall Embedded).
The system includes:
Ardubike:
4 LED RGB Strip-Addressable 0.5 M for front and back safety lights and turn signals
1 Me Joystick Module for turn signals
1 Me Potentiometer Module for lights with 4 intensity levels
1 Me Compass to check the vertical bike position and put on the alert signal when it falls off.
1 Orion Board
Helmet:
1 Orion Board
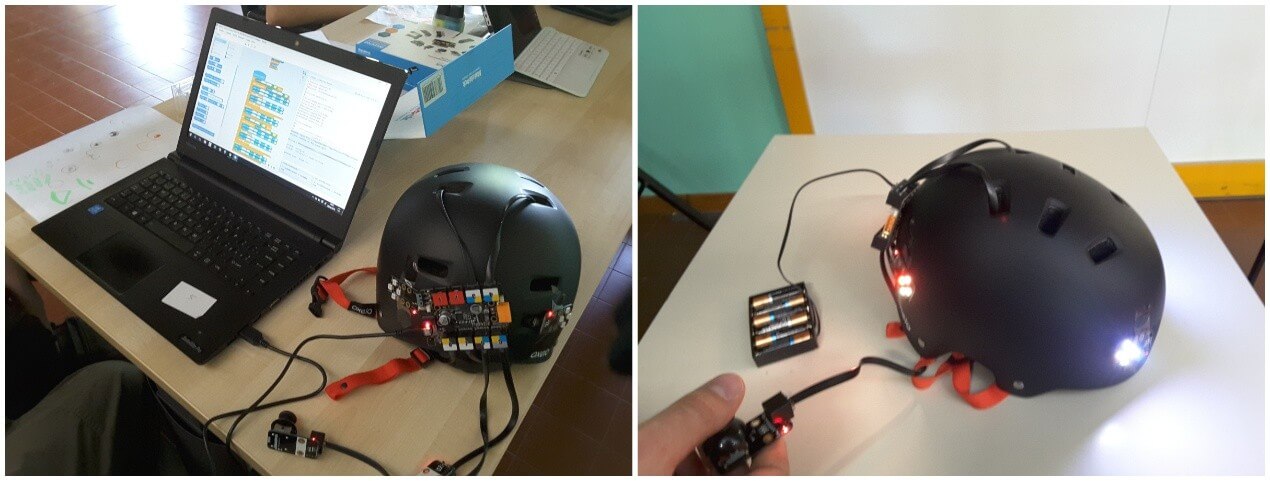
1 Me Joystick Module for turn signals
4 Me RGB LED for turn signals light
The final work:
Ardubike has two systems to improve the rider’s security: the first one is to improve the rider’s visibility to others, there are position light (white on front side and red on back side) and direction light (yellow) to signal when the bike turns. The second one system will be triggered when bike falls down, all LEDs will light up to indicate the danger.
The team:
 The Arubike team: Davide, Emanuel, Flavio, Leonardo, Mattia
After the bike project, the students started to work on a lateral project using the know-how of the first project. They had already made a bike’s helmet with 4 LED RGB and a joystick to create a wearable security system developed with Makeblock components. The helmet would be the first prototype of another project that Luca would like the students to develop next year, which the students would use the Bluetooth module on the bike and developed a safety app (to be created with AppInventor) when they will have an excursion with their bikes.
The helmet:

Q&A with Luca D’Agostino
-What inspired you?
When we started with this new project we had searched for something students would love, a personal work they could relate to on personal level. What is better than a re-designed modern bike for the 13 year-olds? An Ardubike! We took the two first classes together talking about parts an electronic bike must have and then studied the Makeblock Inventor Kit, finally when we had all the tools set and all the skills we needed, we started building the Ardubike.
-What was the hardest part, or the most difficult problem to solve?
With Ardubike we didn’t have a lot of problems, the only trouble was when we mounted all components and we had tested the prototype, we saw that the battery pack was too small for the all LED bike (My students loved LED). To solve this problem, we decided to use two different batteries instead of one. And it turned out to work perfectly.
-If you were to do it over again, what would you do differently?
Nothing, this year we have started with good projection and a calendar with all steps to conclude Ardubike in time.
-What tool was the most helpful?
mBlock helped solve all the coding problems. When we found Me 3 Axis we were very happy because we could mount the fall sensor on our bike!
-How Makeblock – the DIY robotics construction platform enables your students to create workable robots/machines despite having little or no relevant background knowledge (given they are just third graders)?
Makeblock gave us the opportunity to create our project without the difficulties of other component connection by PIN. You can design projects however you like, and, with a few cables, you can connect all you want.#coding robot #programmable robot kits
A Note to Readers: the story was published on the Make: Magazine on June 15th, 2018.